DIY photo walls are more than decoration—they’re visual diaries of your favorite memories. A well-planned gallery wall can turn blank space into a conversation starter filled with family milestones, travel highlights, and everyday joy. From frameless mosaics to thrifted frame glow-ups, these ideas combine layout planning, budget hacks, and meaningful storytelling so every wall feels personal and intentional.
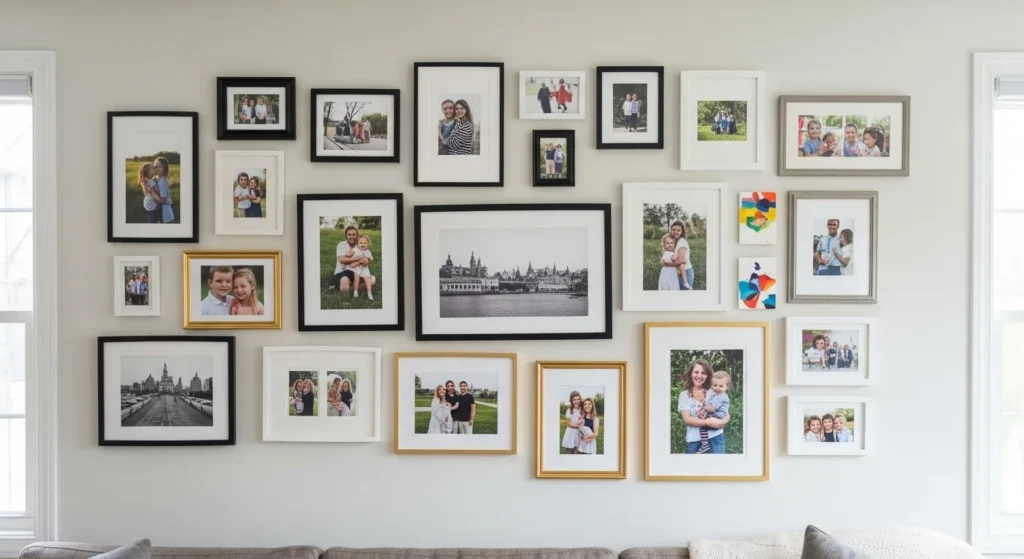
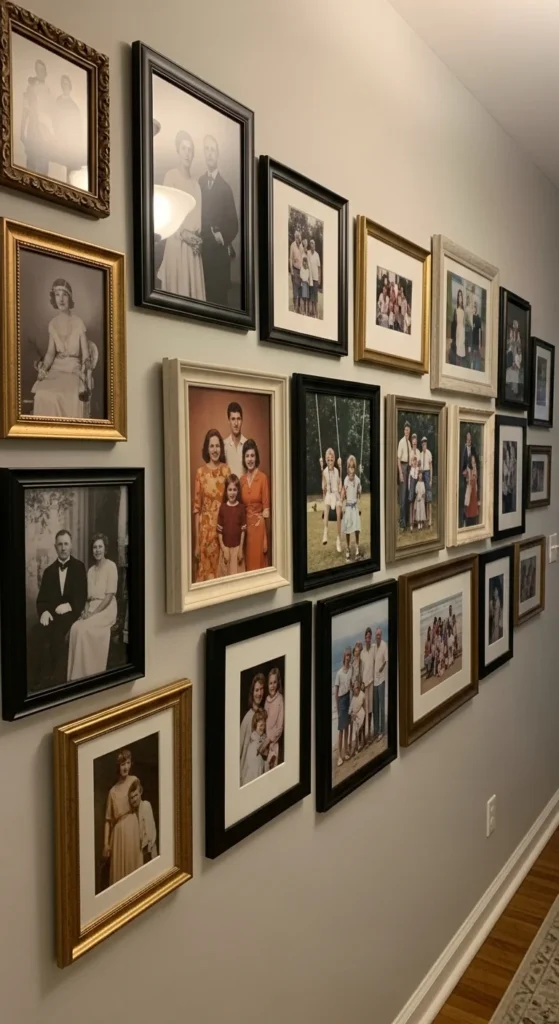
1. Classic Mix-and-Match Gallery Wall
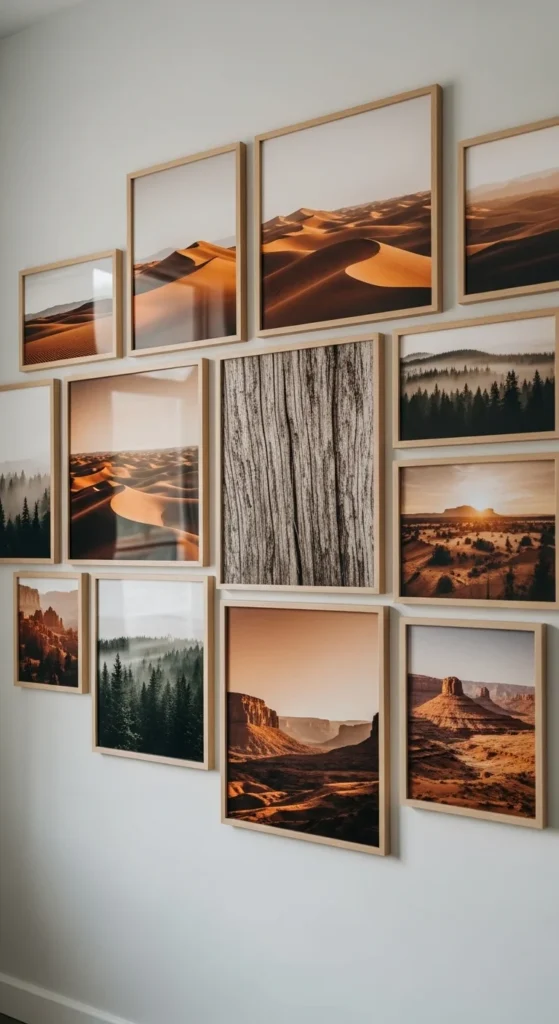
A mix-and-match gallery wall blends frames, art prints, and personal photos for an eclectic look. Combine wood, metal, and painted finishes to create depth without feeling chaotic. Keep spacing consistent—about two inches between frames—for balance. This style works beautifully in living rooms where you want warmth and personality. Sketch your layout on paper first to avoid unnecessary wall holes.
2. Symmetrical Grid Layout

A grid layout creates a clean, structured look that feels polished and modern. Use identical frame sizes and align them evenly for visual harmony. Black and white photos work especially well in this format. Measure carefully and mark with painter’s tape before hanging. It’s ideal for hallways or dining areas where simplicity feels elegant.
3. Asymmetrical Petersburg Style
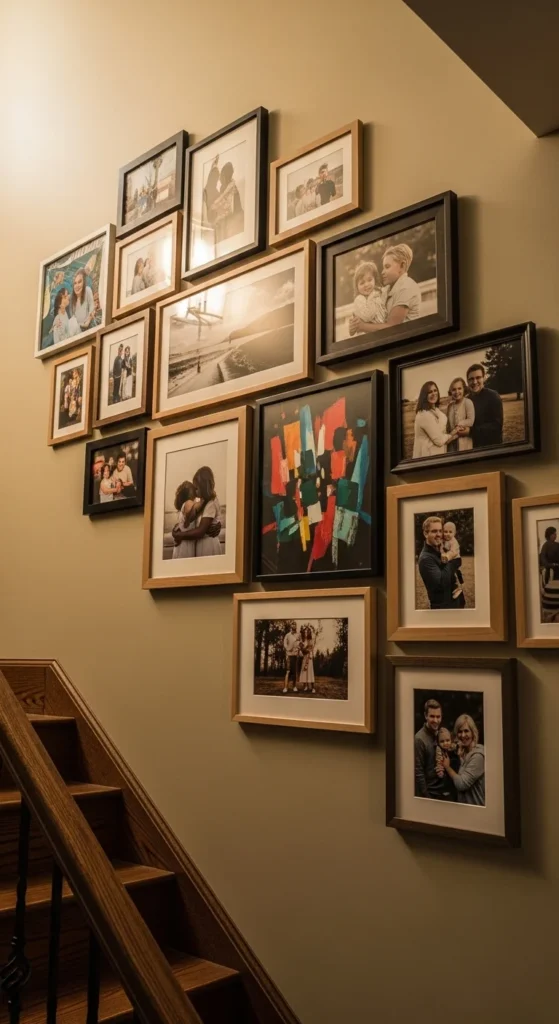
An asymmetrical layout follows an organic pattern, perfect for staircases. Arrange frames to mirror the upward slope of the stairs for natural flow. Mix vertical and horizontal pieces for movement. Start with a center anchor piece and build outward. This dramatic style adds character to transitional spaces.
4. Triptych Panorama Split

Turn a wide landscape photo into a triptych by splitting it into three panels. Hang them evenly spaced for a cohesive storytelling effect. This format works well for travel photography and scenic views. Keep frames minimal so the image remains the focus. It creates a bold focal point above sofas or beds.
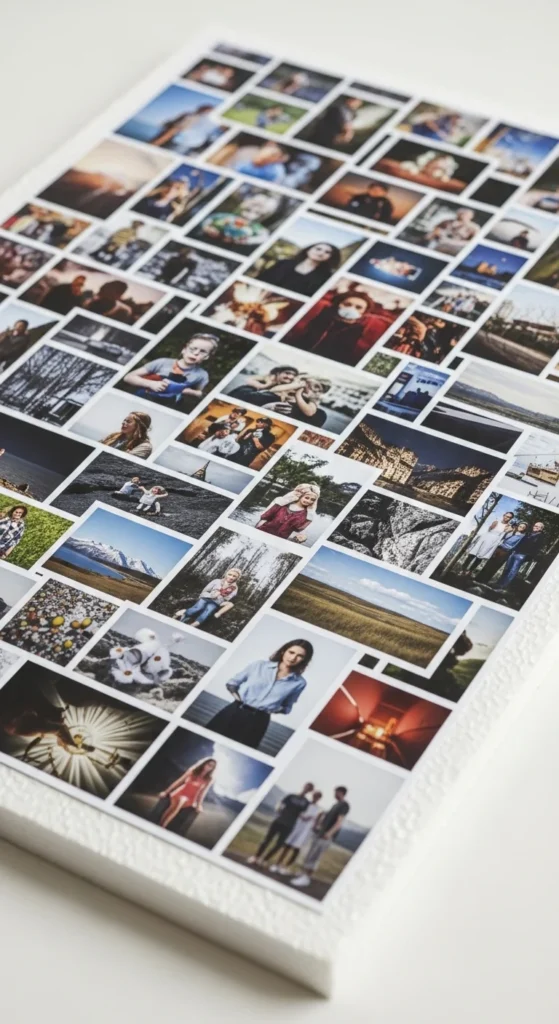
5. Frameless Photo Mosaic
Skip frames and attach printed squares directly to the wall for a mosaic effect. Arrange them tightly for impact or leave small gaps for breathing space. Choose a color theme—like black and white or warm earth tones—for cohesion. This is a budget-friendly approach for dorms or teen bedrooms. It’s playful, easy to update, and full of personality.
6. Vintage Clip String Display
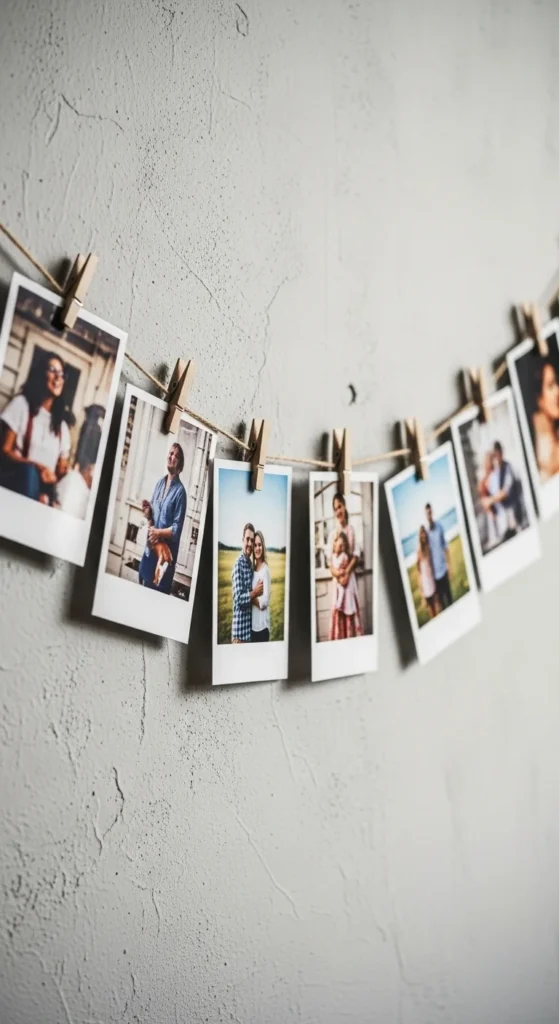
String twine across a wall and clip photos using wooden clothespins. This relaxed display style feels cozy and nostalgic. Swap photos easily whenever you want a refresh. It works well in home offices or creative corners. Add fairy lights for a soft glow at night.
7. Pegboard Photo Wall
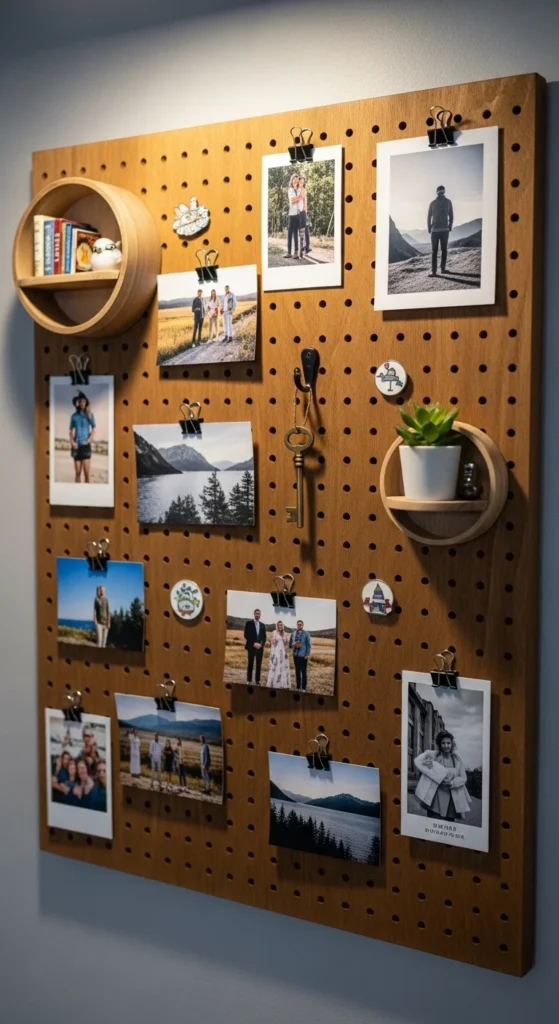
Install a pegboard and attach photos with clips or mini shelves. This flexible system allows you to rearrange pieces anytime. Mix photos with small objects for dimension. It’s great for kids’ rooms or craft spaces. The setup keeps walls organized yet playful.
8. Under $20 Mod Podge Collage
Create a photo collage using foam core boards and Mod Podge. Layer prints slightly for texture and seal with a protective coat. This approach is affordable and impactful. It’s perfect for renters who prefer lightweight pieces. The finished board can lean on shelves or hang easily.
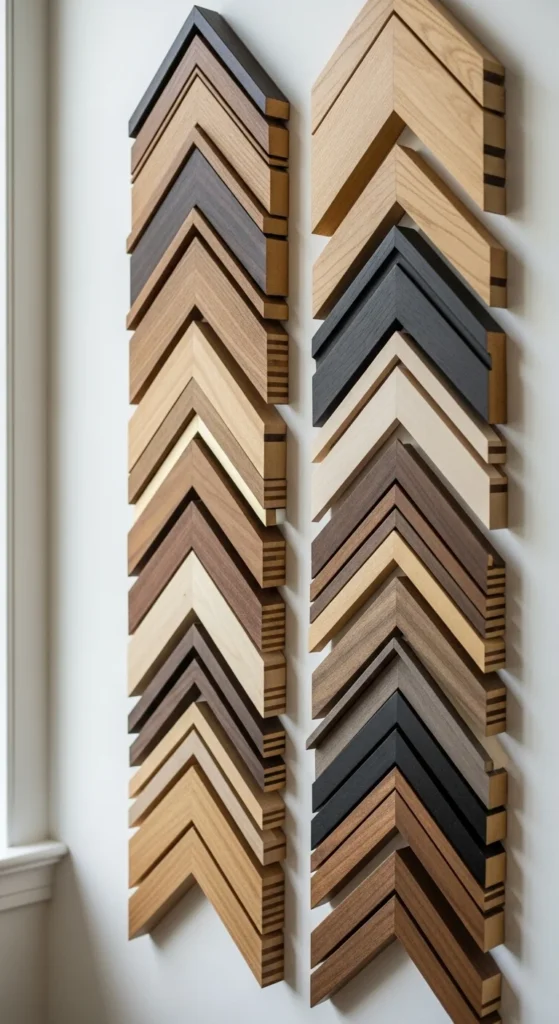
9. Thrifted Frame Glow-Up
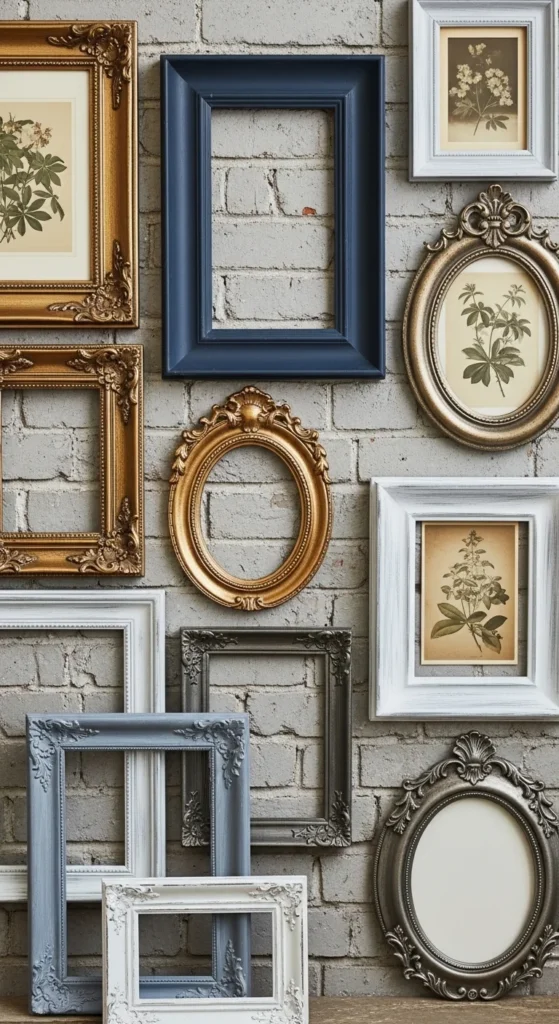
Search thrift shops for inexpensive frames and repaint them for cohesion. Metallic finishes can add subtle shine. Keep the matting neutral for balance. This strategy saves money while achieving a curated look. It’s a smart way to create a personalized display on a budget.
10. Black and White Story Wall
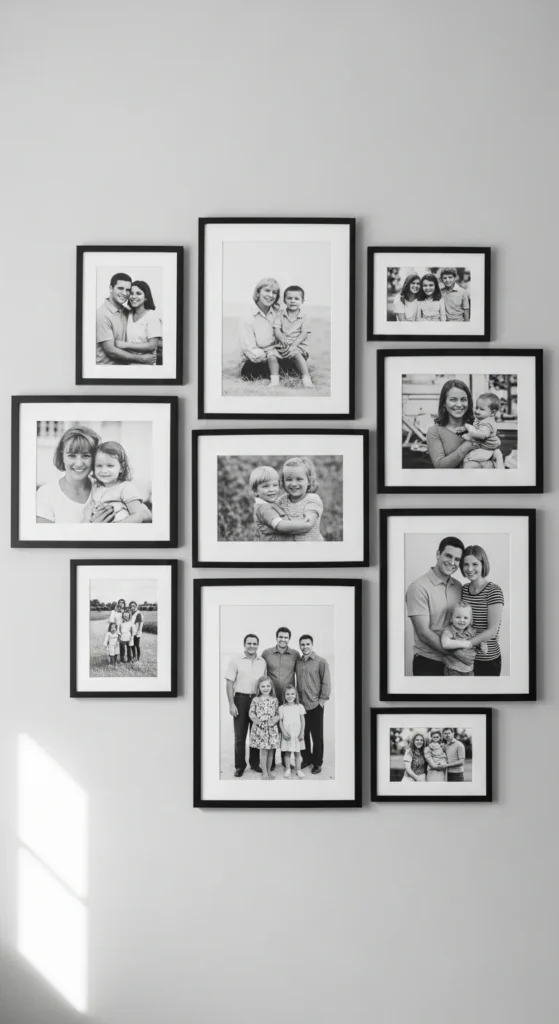
Using only black and white photos creates instant harmony. It removes color distractions and highlights emotion. Pair with simple black or white frames. This theme works beautifully in minimalist interiors. The result feels timeless and refined.
11. Themed Horizontal Row
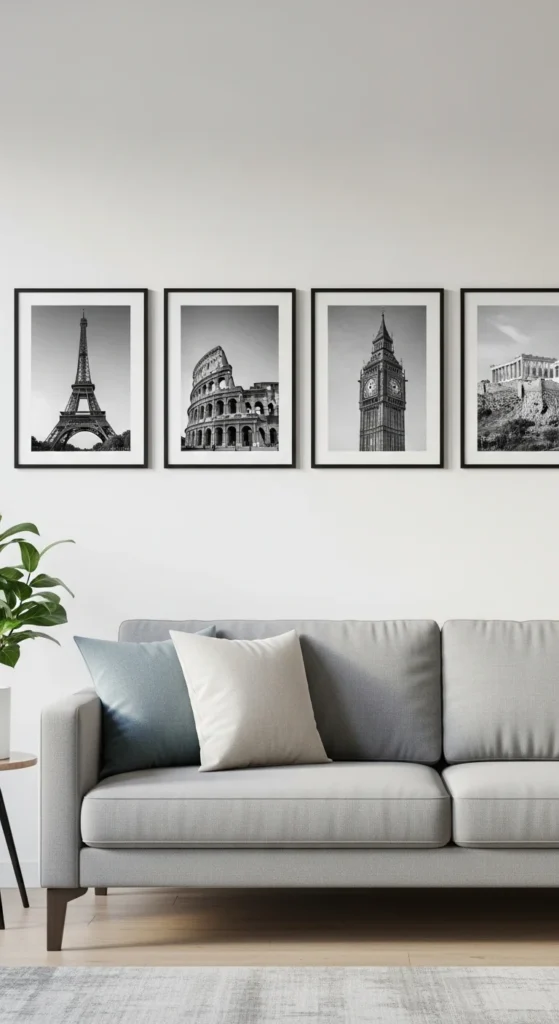
Choose three to five photos and align them in a straight row. Keep spacing equal for a neat appearance. This works well for small spaces where clutter feels overwhelming. It’s simple but impactful above sofas or beds. Perfect for showcasing milestones in sequence.
12. Picture Ledge Layering
Install picture ledges to layer frames without permanent placement. Lean photos and overlap slightly for depth. Add small décor pieces between frames. It’s easy to swap prints anytime. Ideal for renters who want flexibility.
13. Staircase Cluster Arrangement
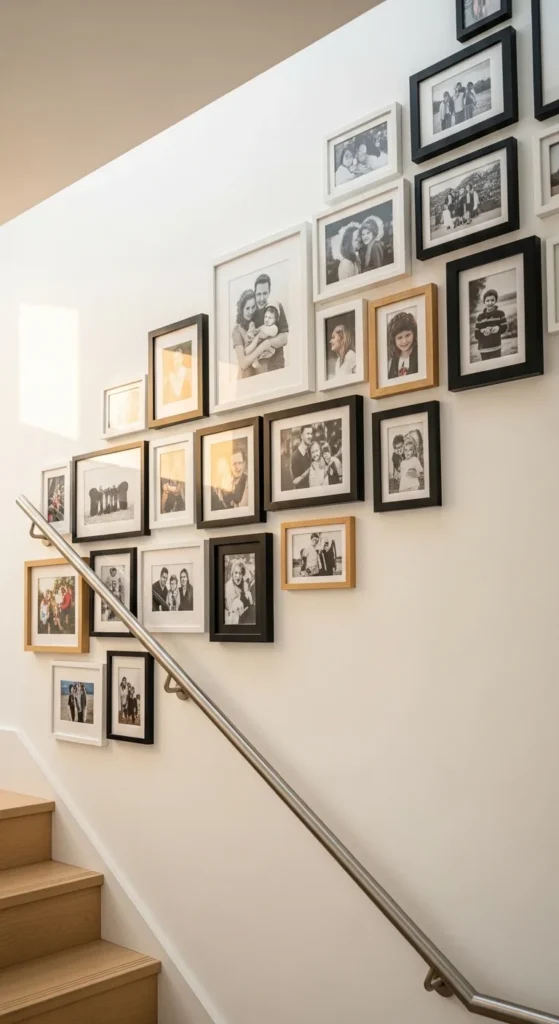
Follow the rise and run of your staircase when arranging frames. Keep spacing consistent along the incline. Mix portrait and landscape orientations. Start from eye level at the bottom. The result feels intentional and balanced.
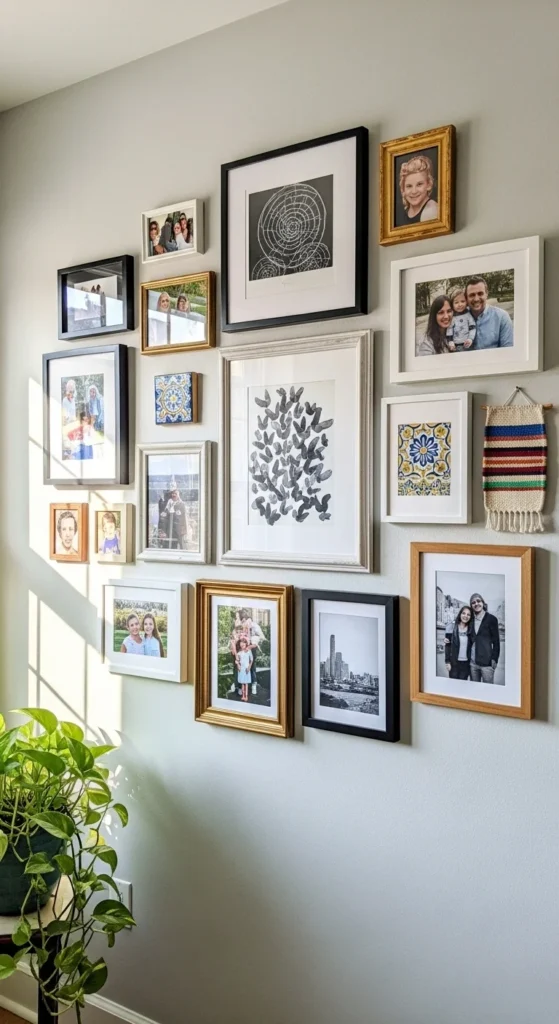
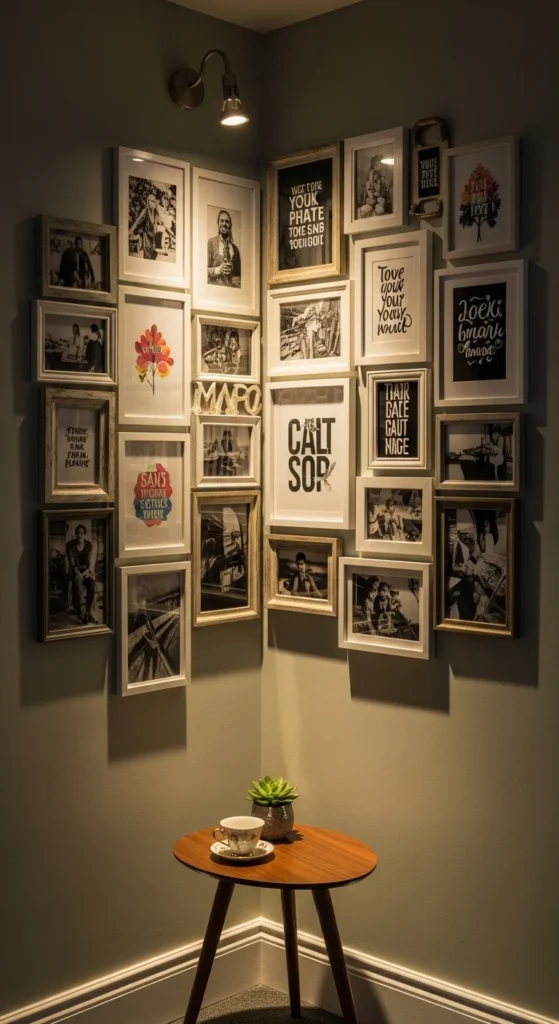
14. Mixed Media Gallery
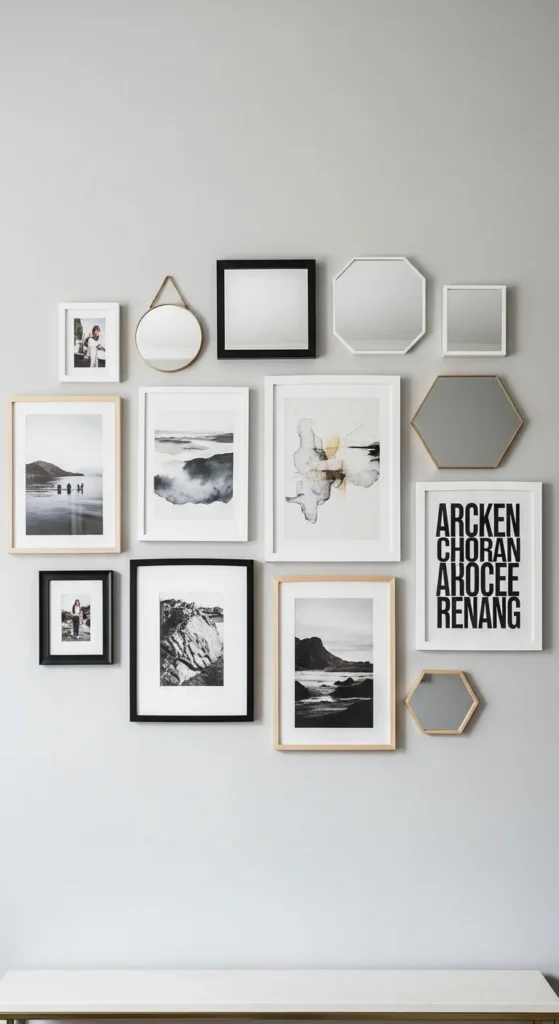
Blend photos with mirrors, art prints, and small objects. This layered approach adds texture and dimension. Keep a consistent color palette to avoid visual chaos. It creates a storytelling wall full of personality. Works well in living rooms or entryways.
15. Canvas and Print Combo
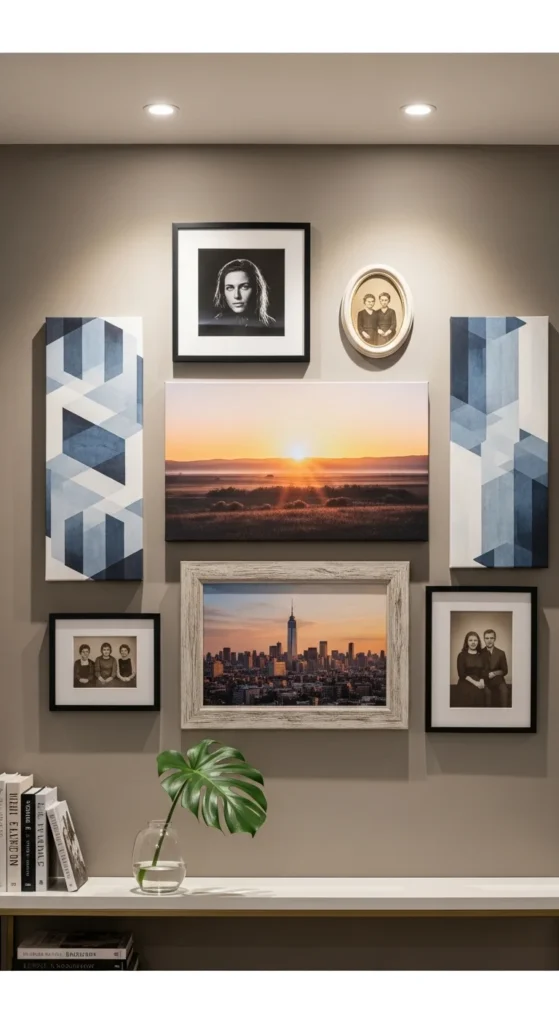
Mix framed photos with canvas prints for variety. The canvas adds depth while frames provide structure. Stick to a theme for cohesion. This works beautifully for family portraits. It makes the wall feel dynamic and curated.
16. Repurposed Window Frame Display
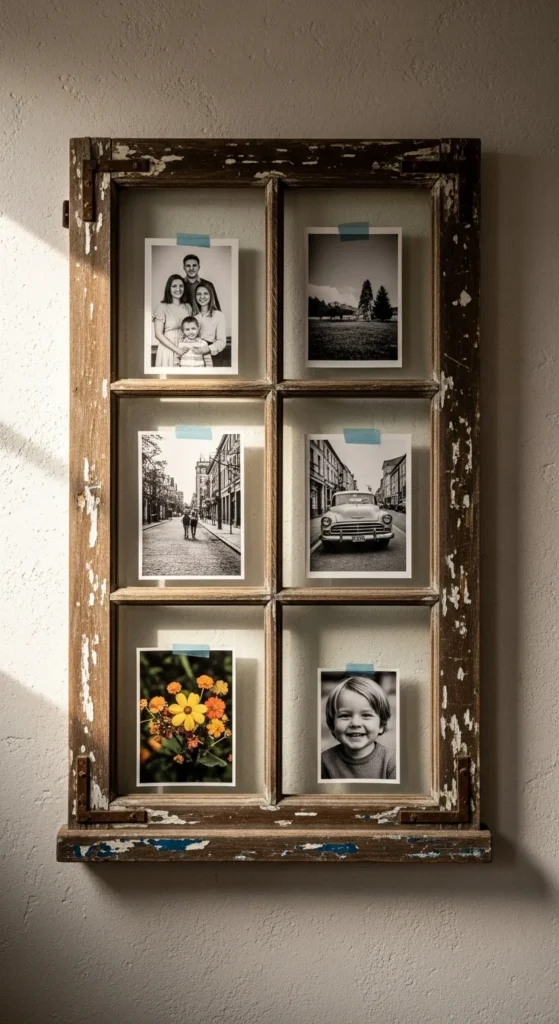
Mount a vintage window frame and attach photos inside each pane. This creative reuse adds rustic charm. It becomes a statement piece instantly. Keep images consistent in tone for harmony. Perfect for farmhouse-inspired interiors.
17. Rent-Friendly Hanging Tricks
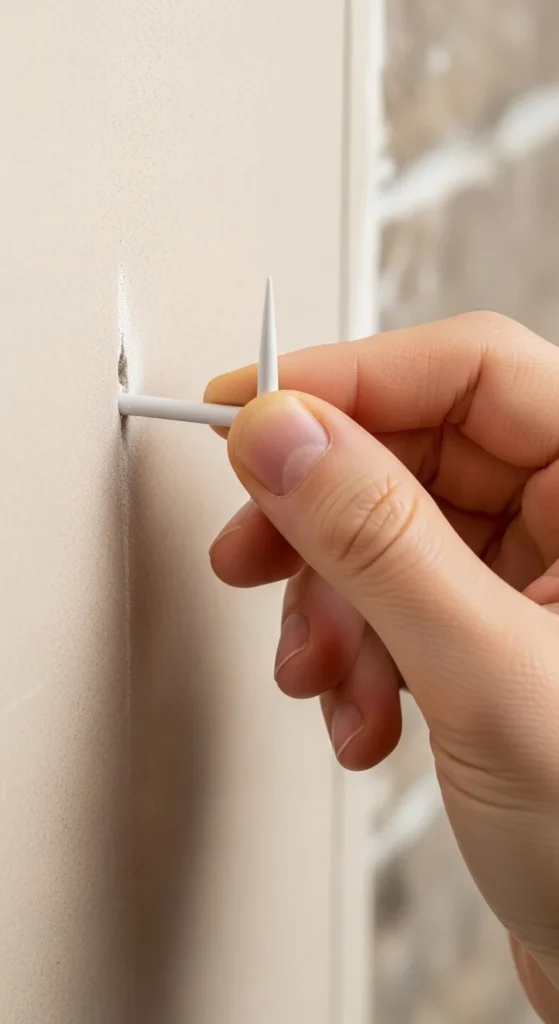
Use damage-free hooks or slim wall hangers for easy installation. They leave minimal marks when removed. Perfect for renters or frequent decorators. Always test placement before securing. It reduces stress and protects your walls.
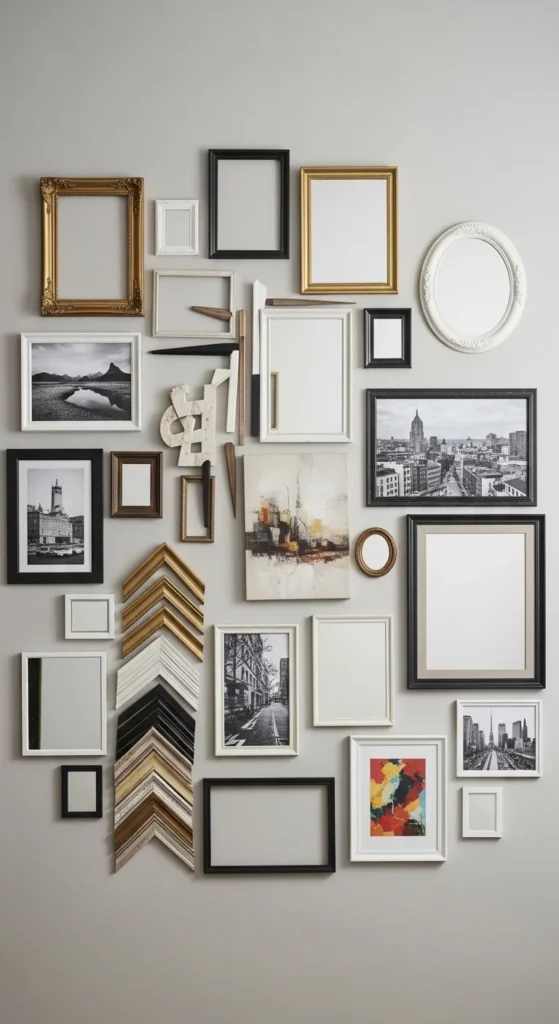
18. Tape-to-Wall Mockup Planning
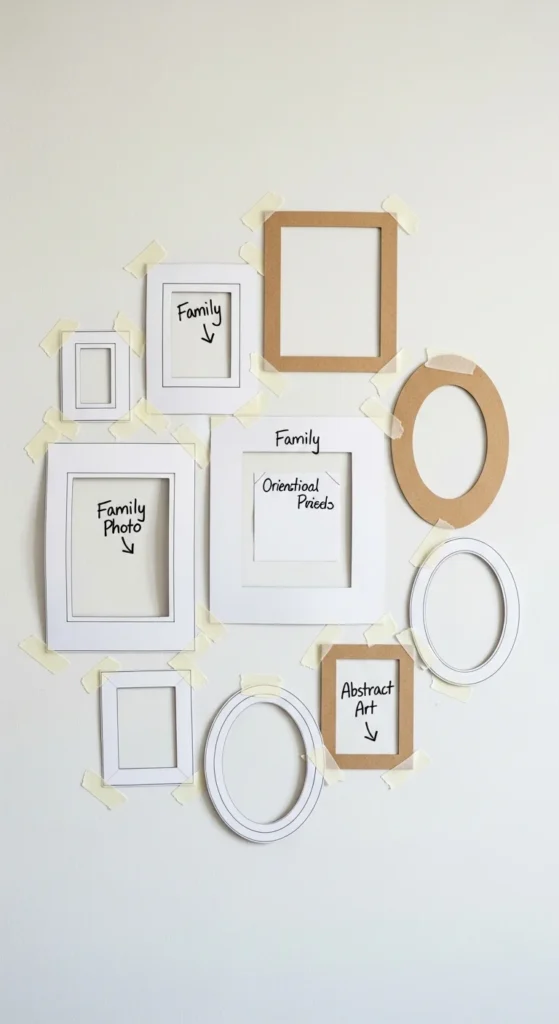
Cut paper templates matching frame sizes and tape them to the wall first. Rearrange until satisfied with spacing. This prevents unnecessary holes. Step back often to check alignment. Planning saves time and frustration.
19. Color-Coordinated Palette Wall
Choose a specific color palette such as earth tones or cool blues. Select photos that complement each other. Matching frames enhance unity. This method keeps eclectic layouts cohesive. It works beautifully in neutral living rooms.
20. Family Milestone Timeline
Arrange photos chronologically to tell your family’s story. Start with older memories and move forward in time. Keep frames uniform for clarity. This creates an emotional, meaningful hallway display. It’s both decorative and deeply personal.
21. Digital Layout Preview Tools

Use digital planning tools to preview your arrangement before hanging. Upload photos and test layouts virtually. This reduces guesswork and improves spacing accuracy. It’s helpful for large gallery walls. Planning digitally makes execution smoother.
22. Small-Space Corner Gallery
Transform a small corner into a mini gallery wall. Use smaller frames and keep spacing tight. Stick to one theme for clarity. It’s perfect for apartments or narrow hallways. Even tiny spaces can tell big stories.
23. Kids’ Art and Photo Combo

Combine children’s artwork with family photos for a lively display. Use colorful frames for energy. Rotate pieces as new artwork arrives. This keeps the wall interactive and evolving. It celebrates creativity and family life together.
24. Souvenir Memory Wall
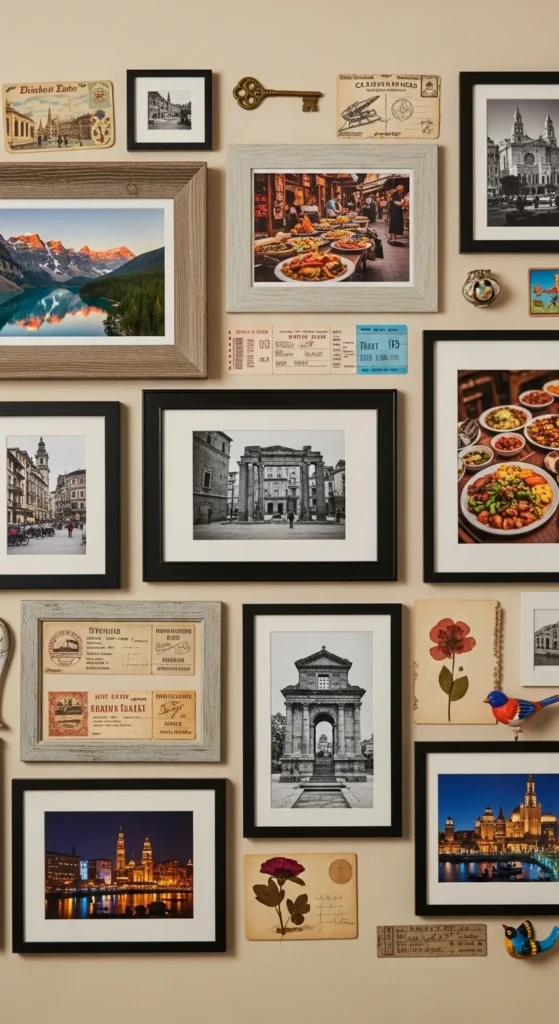
Mix photos with postcards, tickets, or small travel souvenirs. Frame or shadowbox meaningful items. This layered approach turns memories into visual stories. Keep spacing consistent for balance. It transforms your wall into a travel diary.
Conclusion
A DIY photo wall is one of the most meaningful ways to personalize your home. Whether you prefer a structured grid, an eclectic gallery wall, or a simple horizontal row, thoughtful planning makes all the difference. Use budget-friendly tricks, test layouts before hanging, and choose themes that reflect your story. When arranged with care, your walls won’t just display photos—they’ll preserve memories beautifully.