

DIY wreaths are one of the easiest ways to decorate your front door for every season without buying new decorations all year long. Instead of replacing wreaths constantly, many craft tutorials recommend creating one simple base and updating it with seasonal accents like flowers, pumpkins, pinecones, or ribbon.
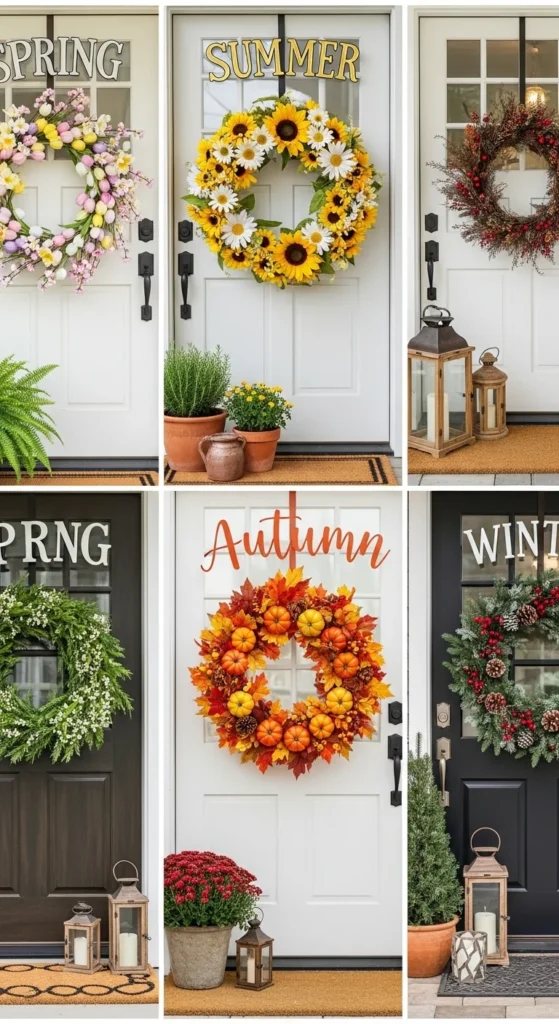
The best part is that a wreath can change throughout the year by simply swapping decorations. Spring florals, summer sunflowers, fall pumpkins, and winter pinecones can all be added to the same base to create a fresh seasonal look.
Step 1: Choose the Right Wreath Base
The wreath base is the foundation of your design. Choosing the right base makes the rest of the project much easier, especially for beginners.
One of the most recommended options is a grapevine wreath base because it has natural branches that allow decorations to be tucked inside easily. Many tutorials highlight grapevine bases as beginner-friendly because stems and greenery can be inserted without complicated tools.
Popular wreath base options
- Grapevine wreath (natural and easy to decorate)
- Foam wreath (great for symmetrical floral designs)
- Wire frame (perfect for ribbon or mesh wreaths)
- Hoop frame (modern minimalist style)
Most beginner guides suggest starting with grapevine or foam bases because they are easier to handle and work with.

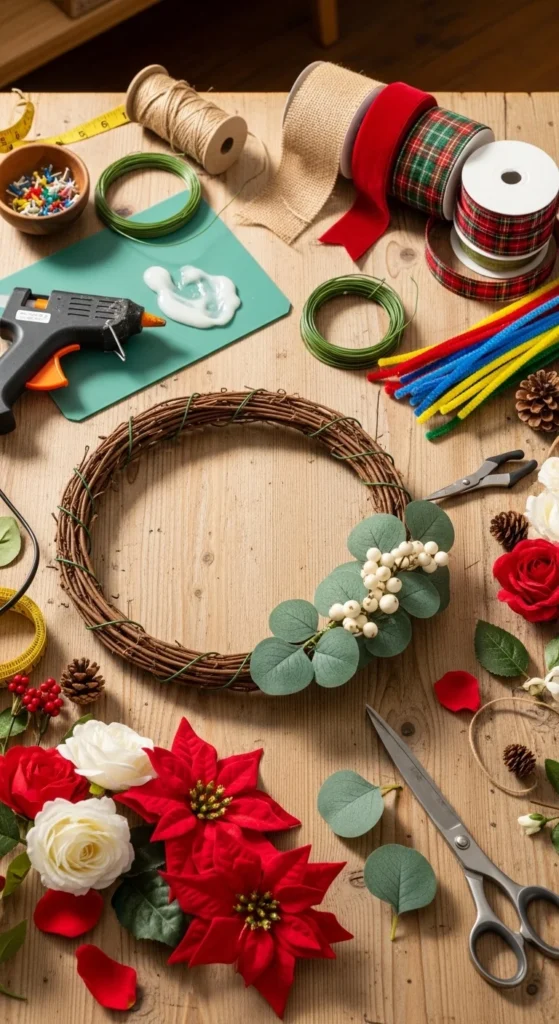
Step 2: Gather Simple DIY Tools
You don’t need a large craft kit to make a wreath. Most tutorials rely on only a few basic tools.
The most important tool is a hot glue gun, which quickly attaches decorations like flowers, bows, or ornaments. It allows beginners to assemble a wreath in minutes.
Essential tools
- Hot glue gun
- Floral wire
- Pipe cleaners or zip ties
- Wire cutters or scissors
Many DIY creators recommend buying these materials from budget stores such as Dollar Tree because the supplies are inexpensive but still work well for wreath projects.
Step 3: Build the Greenery Base Layer
Before adding decorations, most wreath designs begin with a greenery layer. This creates fullness and gives the wreath a natural foundation.
Greenery can include faux leaves, eucalyptus, small branches, or evergreen stems. These elements are usually attached with hot glue or tucked into the grapevine base.
Adding greenery first helps avoid a wreath that looks empty or uneven.
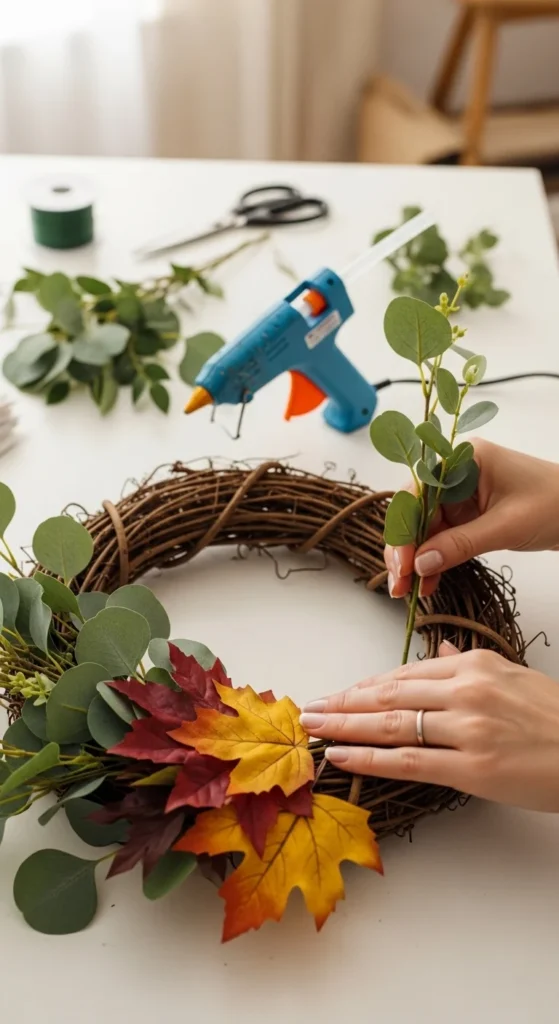
Step 4: Add Texture Fillers for a Fuller Look
One of the most common beginner problems is a wreath that looks too flat or sparse. Adding filler elements creates more dimension and visual interest.
Popular filler materials
- Pinecones
- Faux berries
- Twigs and branches
- Pom poms
- Dried leaves
These items help fill empty spaces and create a more balanced design.

Step 5: Add Seasonal Decorations
The easiest way to make a wreath work for the entire year is by swapping seasonal accents.
Instead of making a new wreath every season, simply replace decorations to match the time of year.
Seasonal decoration ideas
Spring
- Tulips
- Pastel flowers
- Small bird nests
Summer
- Sunflowers
- Citrus slices
- Bright ribbon
Fall
- Mini pumpkins
- Acorns
- Dried leaves
Winter
- Pinecones
- Berries
- Plaid ribbon or ornaments
These small changes completely transform the wreath while keeping the same base.
Step 6: Finish with a Ribbon Bow
Ribbon bows are one of the easiest ways to upgrade the look of a wreath. Many tutorials show how bows can instantly make a wreath look more decorative.
Seasonal ribbon choices can include:
- Burlap ribbon for farmhouse style
- Plaid ribbon for winter
- Bright ribbon for summer
- Pastel ribbon for spring
A large bow placed on the top or side of the wreath creates a finished look.

Step 7: Try Unique Wreath Ideas
Once you learn the basic wreath method, you can experiment with creative variations.
Creative wreath ideas
Fruit wreath
Use dried oranges or mandarins for a decorative and fragrant wreath.
Herb wreath
Use rosemary or eucalyptus for a scented wreath that can also be used for cooking.
Oversized wreath
Use a pool noodle shaped into a circle to create a giant wreath base.
Fabric wreath
Tie colorful bandanas around a wire frame for a playful summer design.

Final Thoughts
Making a DIY wreath for any season is a simple and rewarding project. With a basic wreath base and a few inexpensive tools, you can create a decoration that works all year long.
By swapping seasonal accents, adding greenery layers, and finishing with a ribbon bow, your wreath can easily transform from spring to winter. This method saves money, reduces waste, and allows you to create a beautiful custom decoration for your front door.