Sunburst mirrors are the ultimate bold statement wall decor. Store-bought versions can cost hundreds, but creating your own DIY sunburst mirror is fun, budget-friendly, and completely customizable. With a few simple materials, you can turn any blank wall into a stunning focal point.
Step 1: Choose Your Mirror Base

- Start with a round mirror as the central piece of your sunburst design.
- Small mirrors (5–8 inches) are ideal for gallery walls or grouped arrangements.
- Larger mirrors create a bold standalone statement on a wall.
- Choose your mirror size first, as it determines the length of the sun rays.
- The mirror size also affects the overall visual impact of your sunburst decor.
Step 2: Pick Your Sunburst Style

There are three main ways to structure your sunburst mirror:
- Dowel-based: Tiered lengths of wood dowels for classic metallic look.
- Cardboard & paper: Budget-friendly, no-power-tools option.
- Rustic driftwood / spoons: Textured, boho-glam aesthetic.
Choose the style that matches your space and available materials.
Step 3: Gather Tools & Materials
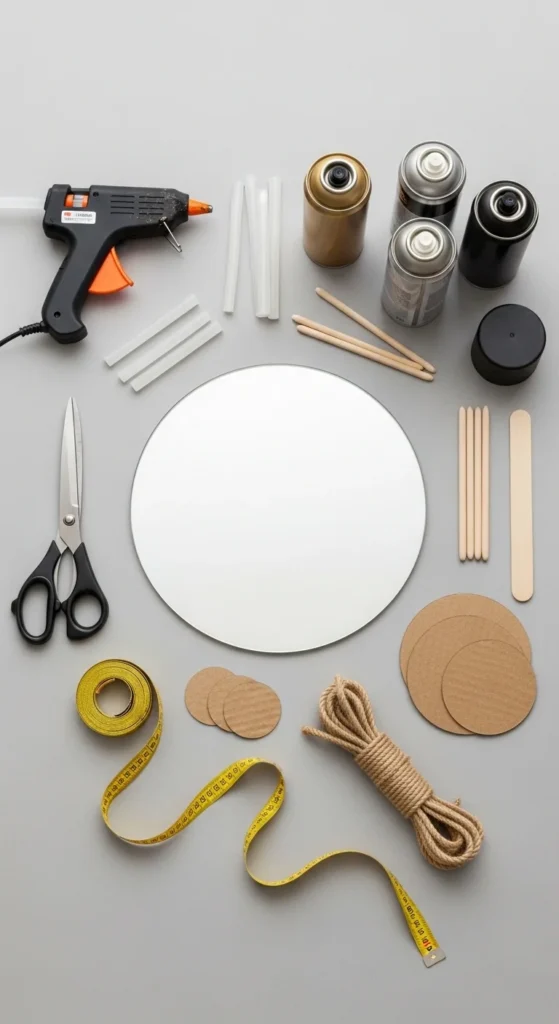
Essential tools across most tutorials include:
- Hot glue or Liquid Nails
- Spray paint in metallic or matte shades
- Round mirror
- Sticks, dowels, or cardboard strips
- Hooks, ribbon, or rope for hanging
Optional upgrades: protractor or paper template for symmetry, tape for clean paint lines, driftwood for texture.
Step 4: Cut & Arrange the Rays

To achieve a layered sunburst effect:
- Cut sticks or strips into multiple lengths.
- Arrange them around the mirror in repeating patterns (e.g., 18–12–9–6 inches).
- Use folded paper templates or a protractor to mark even spacing for symmetry.
Beginner tip: perfection isn’t necessary—slight variations add charm.
Step 5: Glue Your Rays

Attach the rays to the back of the mirror using hot glue or Liquid Nails.
Start with the longest pieces first to establish the base layer.
Layer shorter rays on top to create a tiered, sunburst effect.
For a cleaner finish, cover glue lines with rope, ribbon, or extra small strips.
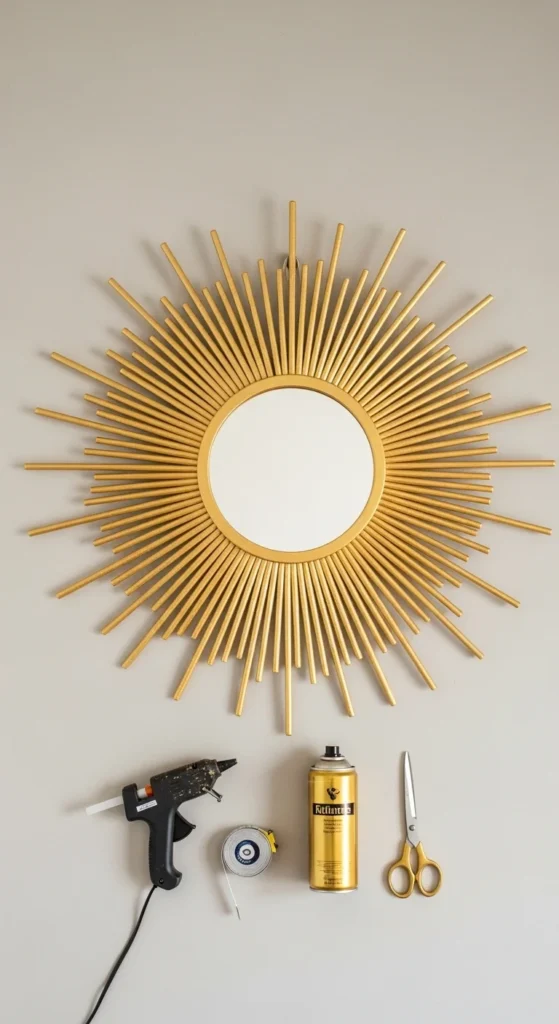
Step 6: Paint & Finish

- Spray paint your sunburst mirror in your chosen finish.
- Popular metallics for a glam look: gold, silver, copper.
- Modern minimal options: black or white.
- Mix matte and glossy finishes to add visual depth.
- Optional: Once fully dry, seal with matte spray for dust protection or mild outdoor exposure.
Step 7: Add Hanging Hardware

- Choose your hanging method: hooks, ribbon, or rope.
- Lightweight mirrors (<5 lbs): a single nail is sufficient.
- Heavier mirrors: use wall anchors or picture hangers for support.
- Check wall type: ensure your chosen method is safe for drywall, plaster, or brick.
- Double-check weight capacity: confirm your hardware can hold the mirror securely.
Step 8: Style & Display

Sunburst mirrors work well in:
- Above beds
- Entryway focal walls
- Living-room gallery walls
Pair them with neutral frames or eclectic prints to highlight the mirror without overwhelming the space. Color-matching with your wall palette enhances cohesion—gold = luxury, black/white = modern, driftwood = boho.
Bonus Ideas
- No-power-tools project: Cardboard and paper strips with glue only.
- Upcycled materials: Use leftover paint sticks or spoons for texture.
- Family craft version: Pre-cut strips and washable paints make it kid-safe.
- Printable template: Offer a sunburst pattern for precise measurements and symmetry.
- Outdoor-adjacent: Seal painted mirror for semi-outdoor spaces like covered patios.

Final Thoughts
DIY sunburst mirrors are more than a craft—they’re a statement piece that transforms any wall into a bold, eye-catching focal point. With budget-friendly options, beginner-friendly builds, and multiple style variations, anyone can create stunning wall decor that looks store-bought but feels personal and handcrafted.