Open shelves can instantly elevate a room or make it feel cluttered and chaotic. The difference? A simple styling formula.
This step-by-step guide combines layering, the rule of three, height variation, and negative space so you can style your shelves like a pro even if you’re a beginner.
Step 1: Choose a Simple Color Palette First
Before placing a single object, decide on 2–3 tones pulled from your room.
This prevents shelves from looking random or busy.
Examples:
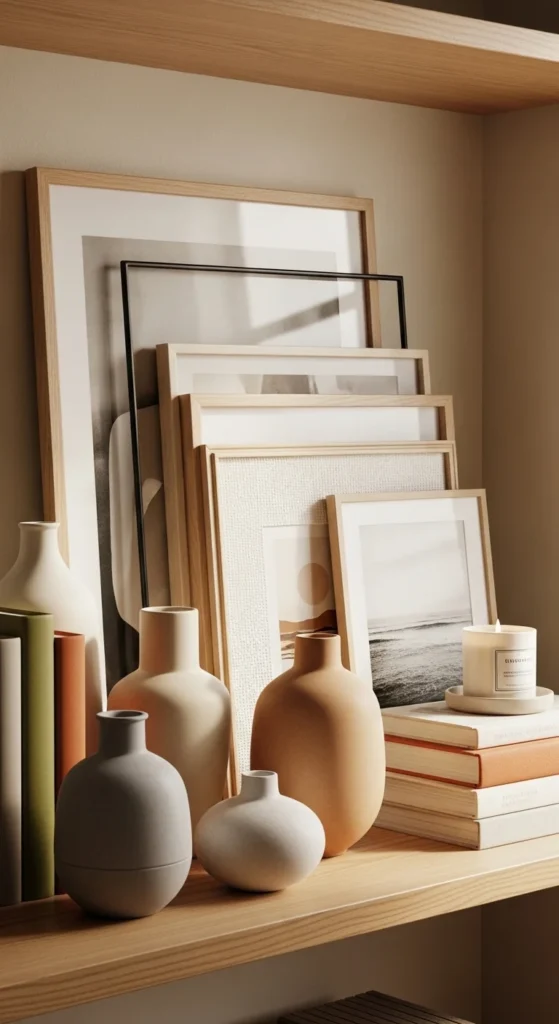
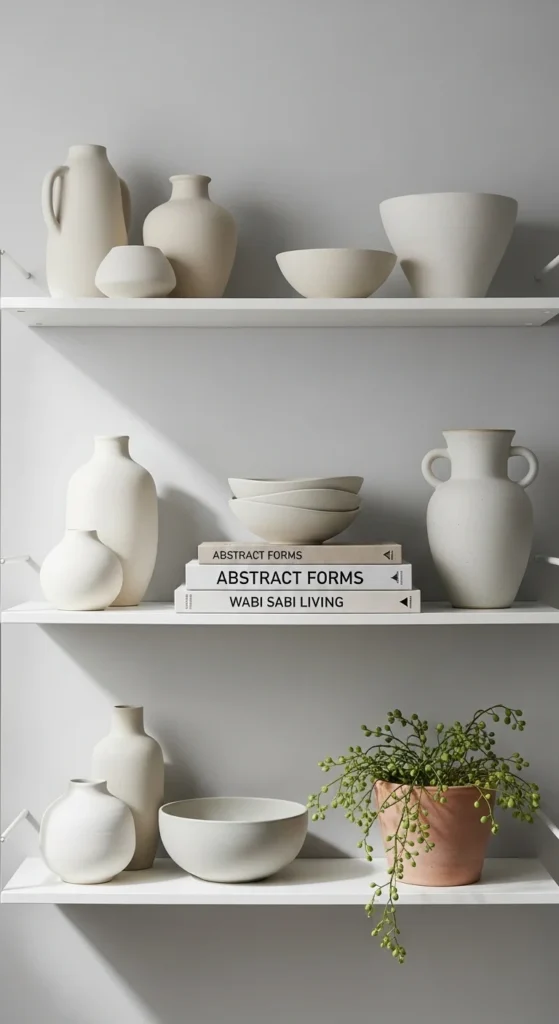
- Warm neutrals (cream, wood, matte black)
- Moody tones (deep blue, brass, white)
- Earthy palette (clay, olive, natural wood)
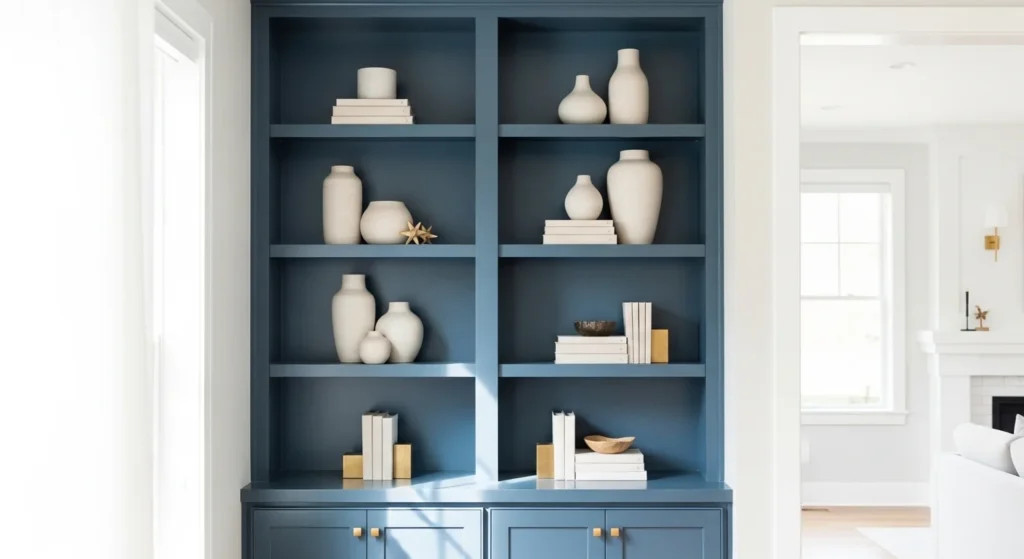
Trending in 2026: bold painted shelves in rust reds and moody blues for contrast in small spaces.

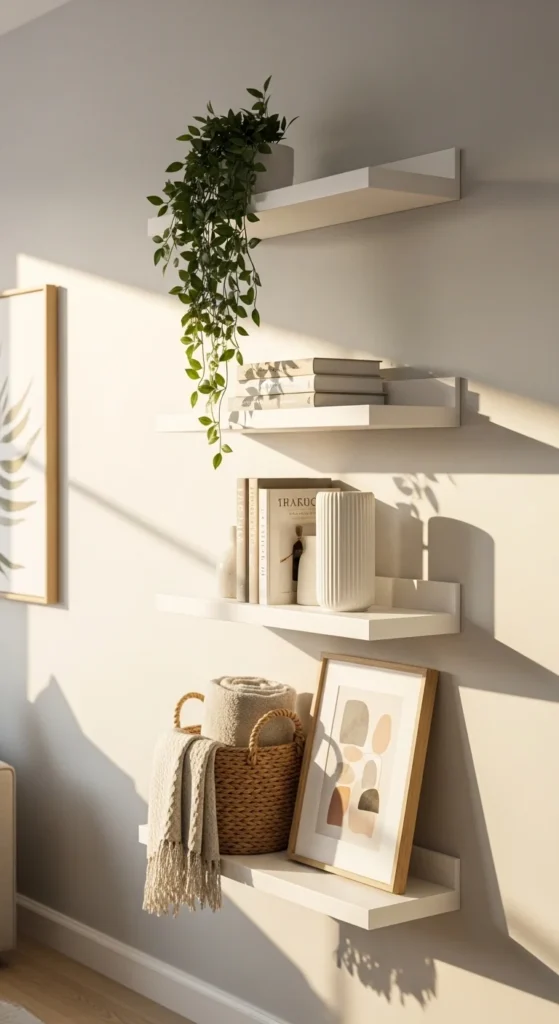
Step 2: Start at the Top and Work Down
Designers don’t randomly fill shelves. They use a top-to-bottom method.
- Style the top shelf with fuller coverage
- Create intentional groupings below
- Balance heavier items toward the bottom
This keeps visual weight grounded and prevents imbalance.

Step 3: Use the Rule of Three for Instant Balance
The Rule of Three is one of the most powerful styling techniques. Group items in odd numbers especially threes.
Instead of placing two objects side by side, try:
- Vase
- Stack of books
- Small decorative object
Odd numbers feel natural and visually appealing.
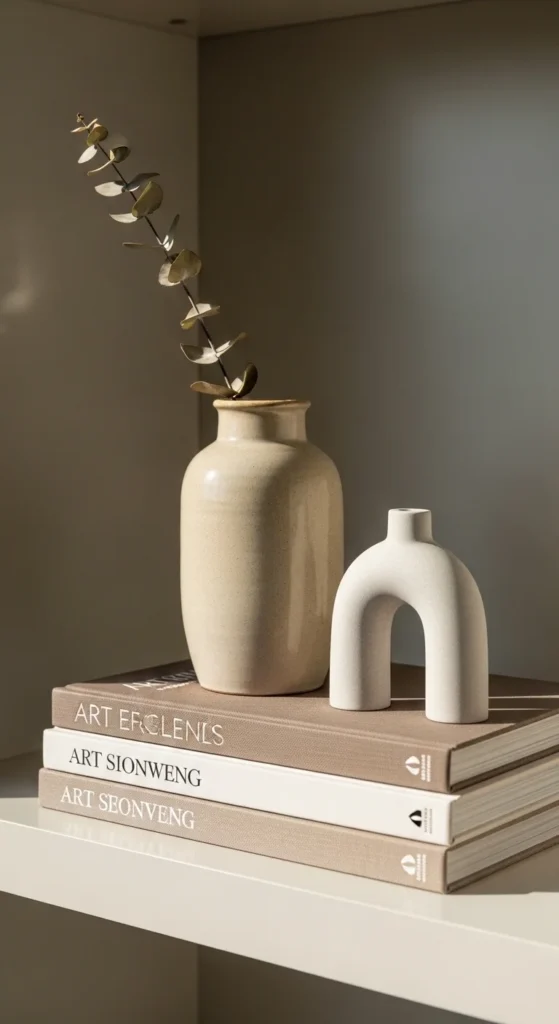
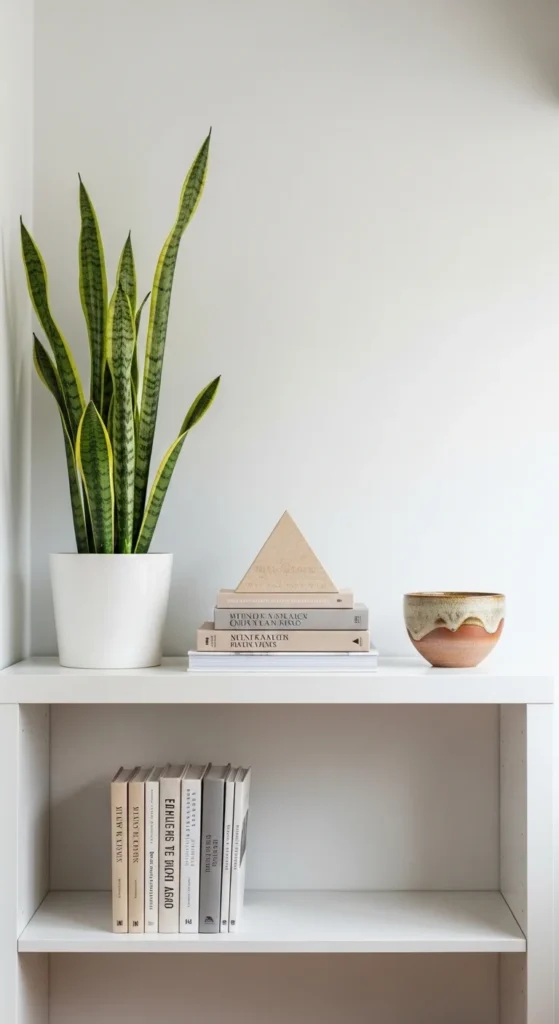
Step 4: Vary Heights Using the Triangle Formula
Flat shelves look boring. Height variation creates dimension.
Follow this simple formula:
- 1 Tall item (vase or plant)
- 1 Medium item (stacked books)
- 1 Small item (bowl or object)
A tall Snake plant works beautifully as an anchor piece.
You can also use books as risers to fake height.
Step 5: Layer for Depth (Don’t Line Everything Up)
One of the biggest beginner mistakes is lining objects in a single row.
Instead:
- Lean art behind vases
- Overlap frames slightly
- Place smaller decor in front of books
Layering creates depth and eliminates the “flat” look.
Step 6: Leave Negative Space (Edit Ruthlessly)
If every inch is filled, shelves feel cluttered.
Negative space gives your eyes room to rest.
After styling:
- Step back
- Take a photo
- Remove one small item from each shelf
Less is often more.
Step 7: Mix Textures for Designer-Level Interest
Professional shelves mix materials:
- Wood
- Ceramic
- Metal
- Glass
- Woven baskets
For example, pair a ceramic vase with reclaimed wood shelves and a brass object.
Sustainable materials like Bamboo are rising in popularity for eco-friendly decor.
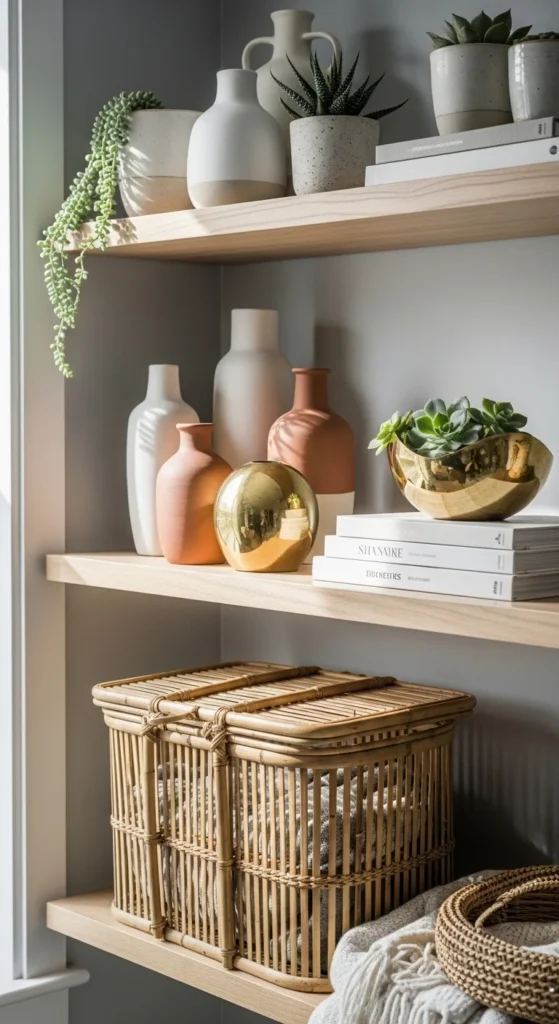
Step 8: Add One Plant for Every 2–3 Shelves
Greenery adds life and movement.
You don’t need many plants just one statement piece every few shelves.
Plants soften hard lines and prevent shelves from looking stiff.
Final Styling Checklist (Save This)
Before you finish, ask yourself:
✔ Did I use odd-number groupings?
✔ Do heights vary (tall, medium, small)?
✔ Is there breathing room?
✔ Did I layer instead of line up?
✔ Are textures mixed?
✔ Does the color palette feel cohesive?
If yes — you just styled your shelves like a designer.
Final Thought
Shelf styling isn’t about buying more decor.
It’s about arranging what you already own with intention.
Layer thoughtfully.
Edit boldly.
Leave space.
And remember the best shelves tell a story, not just fill a wall.