Create beautiful, glossy home decor using resin crafting — even if you have no prior experience
Perfect for beginners who want professional, glass-like results
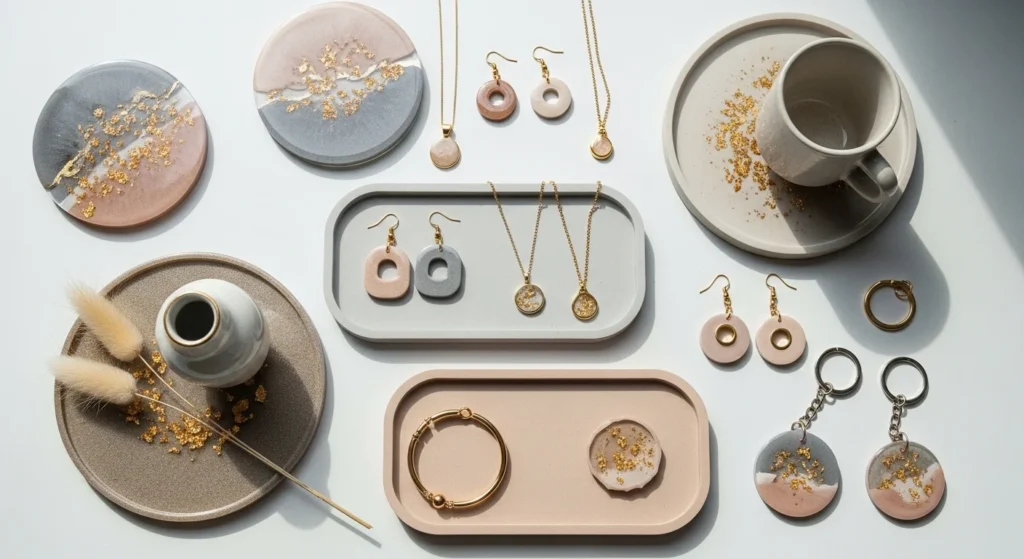
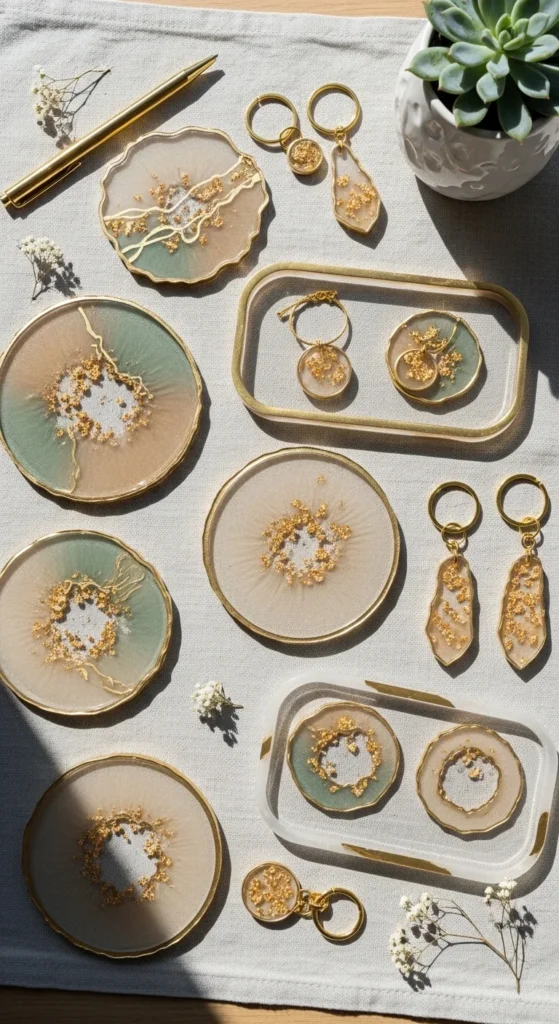
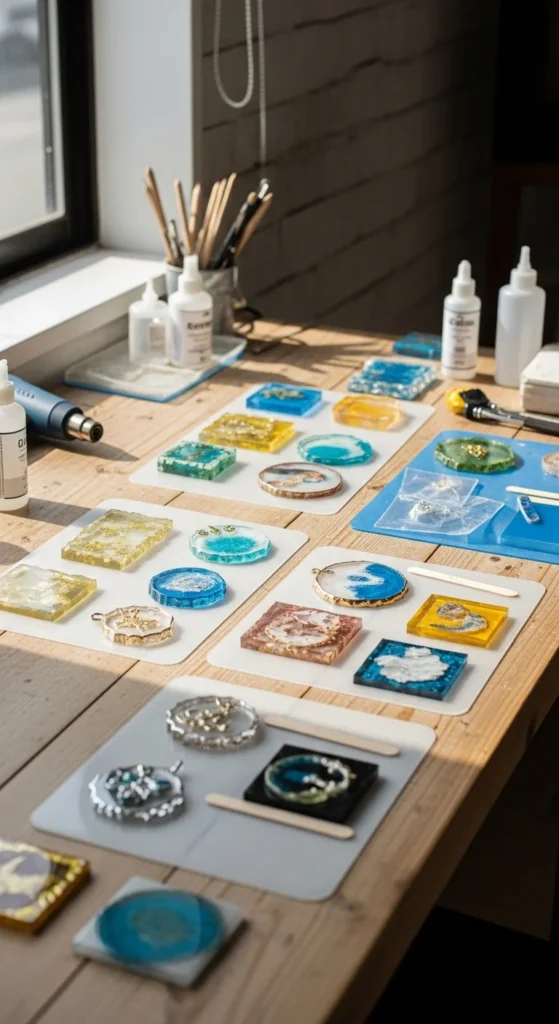
Make trendy items like coasters, jewelry, trays, and keychains
Use simple tools and beginner-friendly resin kits
Customize designs with colors, glitter, and natural elements
Turn your resin crafts into gifts or even a small business
Focus on easy, aesthetic, and high-gloss decor ideas
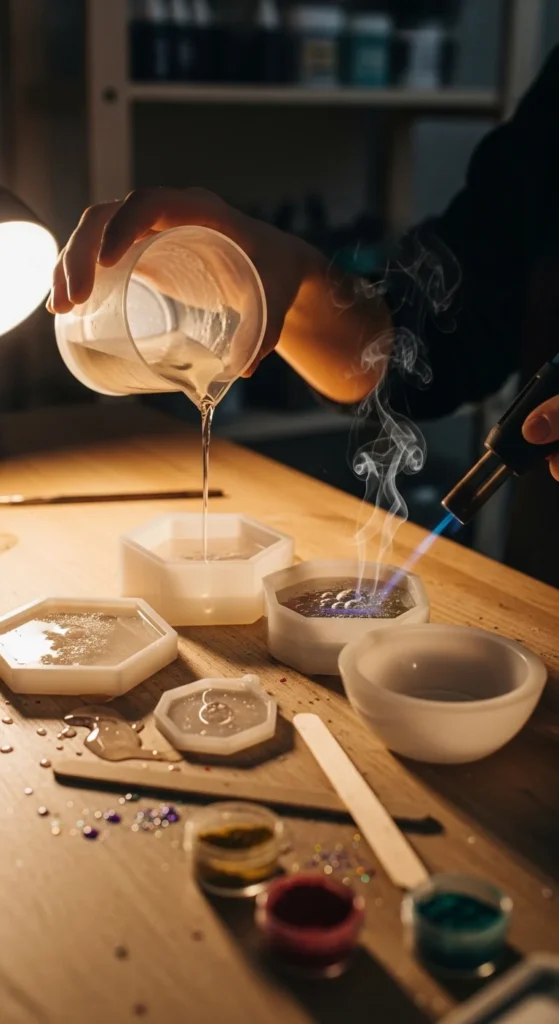
Step 1: Set Up a Safe Resin Workspace
Safety always comes first when working with resin
- Work in a well-ventilated area
- Use gloves and a face mask
- Cover your table with plastic or paper
- Keep pets and kids away during curing
A clean, safe workspace prevents mistakes and health risks
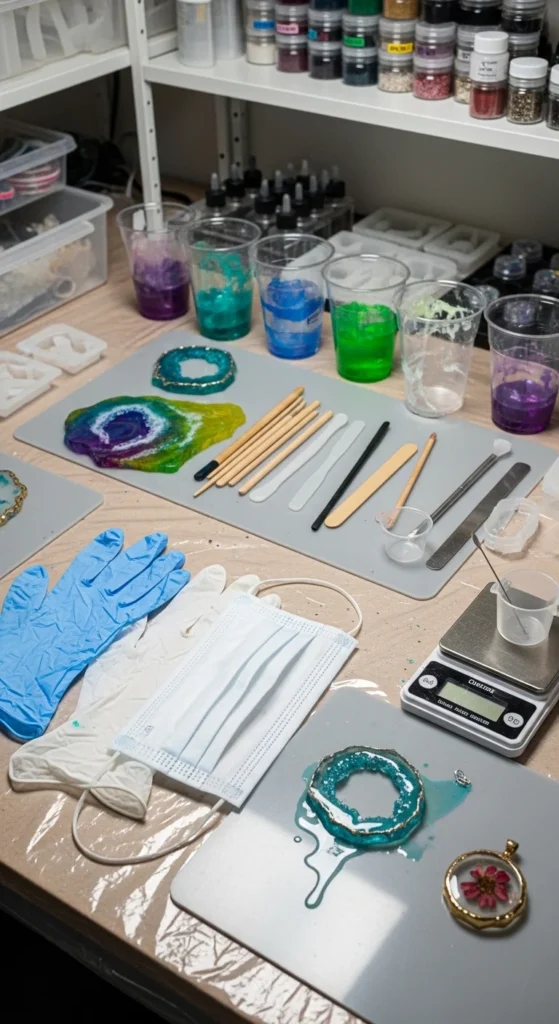
Step 2: Gather Your Resin Supplies
Start with beginner essentials
- Resin starter kit (epoxy or UV resin)
- Silicone molds (for shapes)
- Mixing cups and sticks
- Pigments, mica powders, or glitter
- Toothpicks or sticks for detailing
- Heat gun or lighter (for bubbles)
Starter kits make the process easier and stress-free
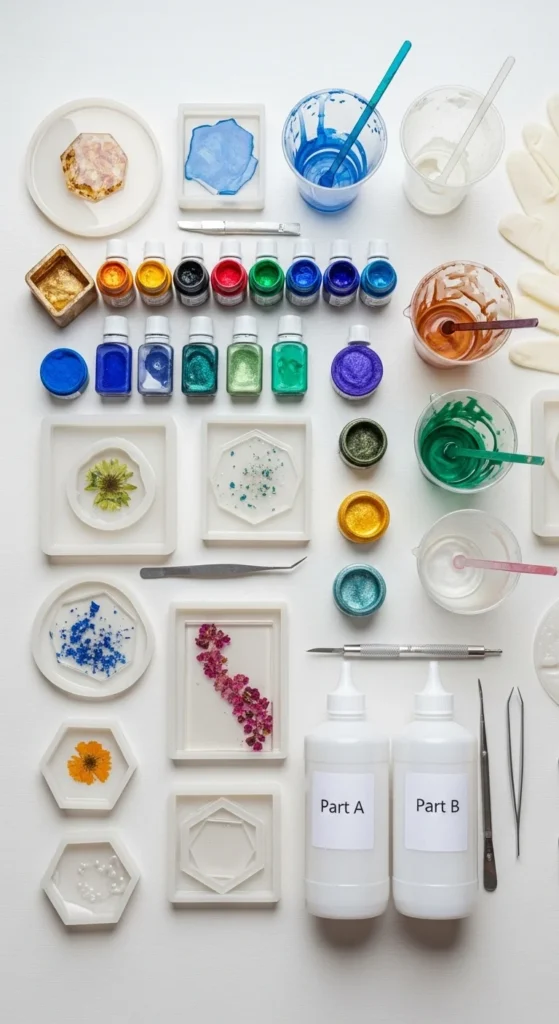
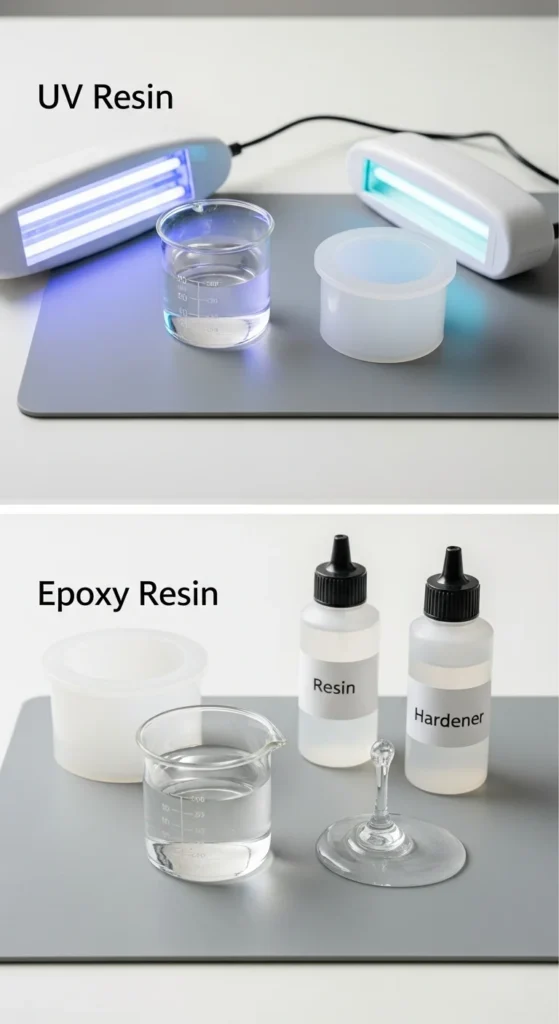
Step 3: Understand Resin Types (UV vs Epoxy)
Choose the right resin for your project
- UV resin: Fast curing, best for small items like jewelry
- Epoxy resin: Slower curing, ideal for coasters and trays
- UV = quick and beginner-friendly
- Epoxy = durable and versatile
Start with UV resin if you want quick results
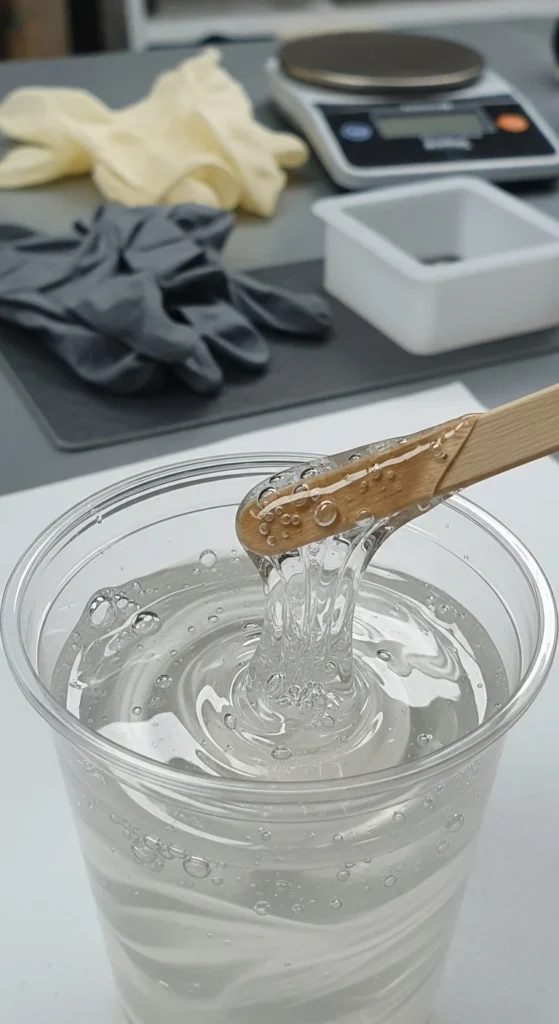
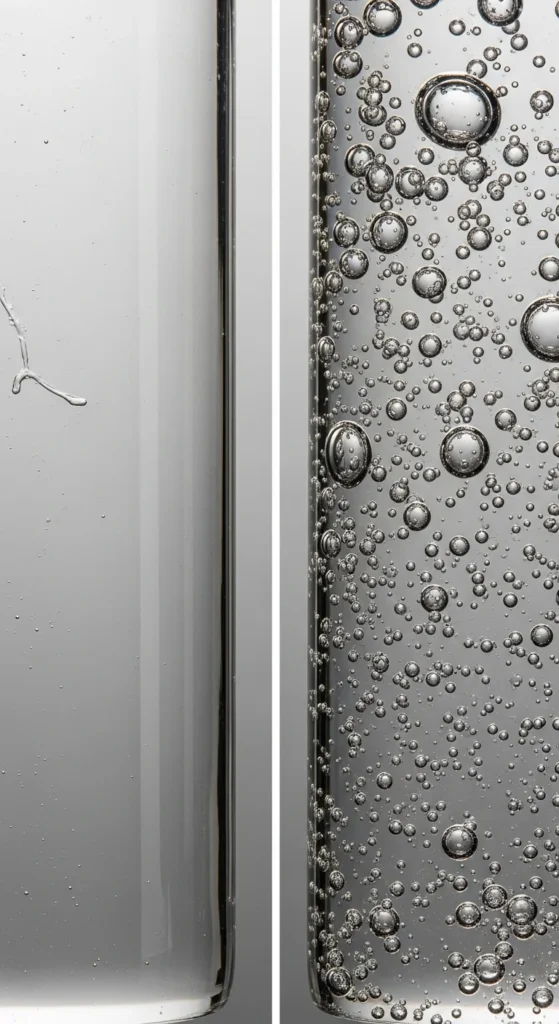
Step 4: Mix Resin Correctly (Golden Rule)
Mixing is the most important step
- Follow 1:1 ratio (resin + hardener)
- Stir slowly to avoid bubbles
- Mix for 2–3 minutes evenly
- Don’t rush this step
Incorrect mixing leads to sticky or results
Step 5: Try Easy Beginner Resin Projects
Start with simple and trending ideas
- Coasters
- Earrings and pendants
- Keychains
- Small charms
- Mini decorative pieces
These projects are easy, quick, and perfect for practice
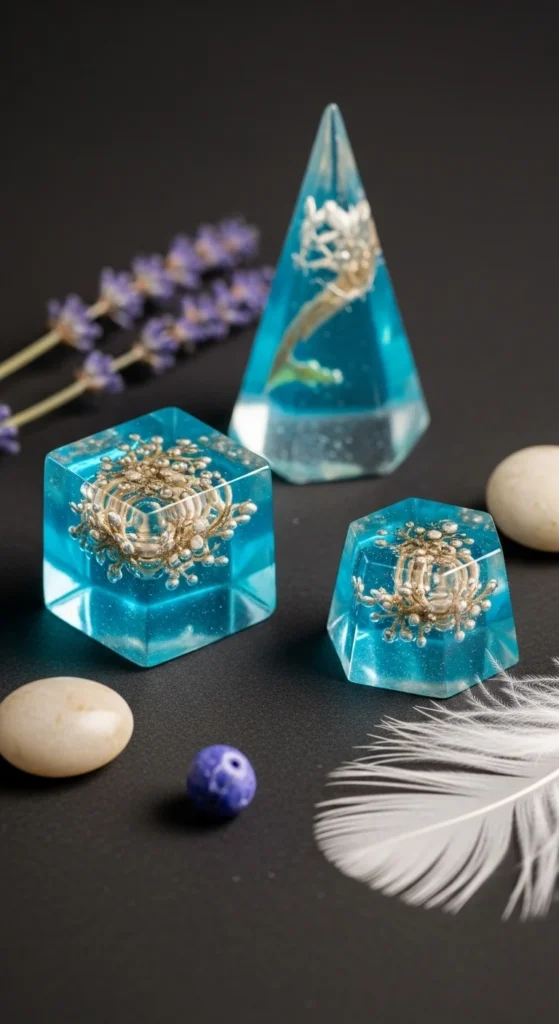
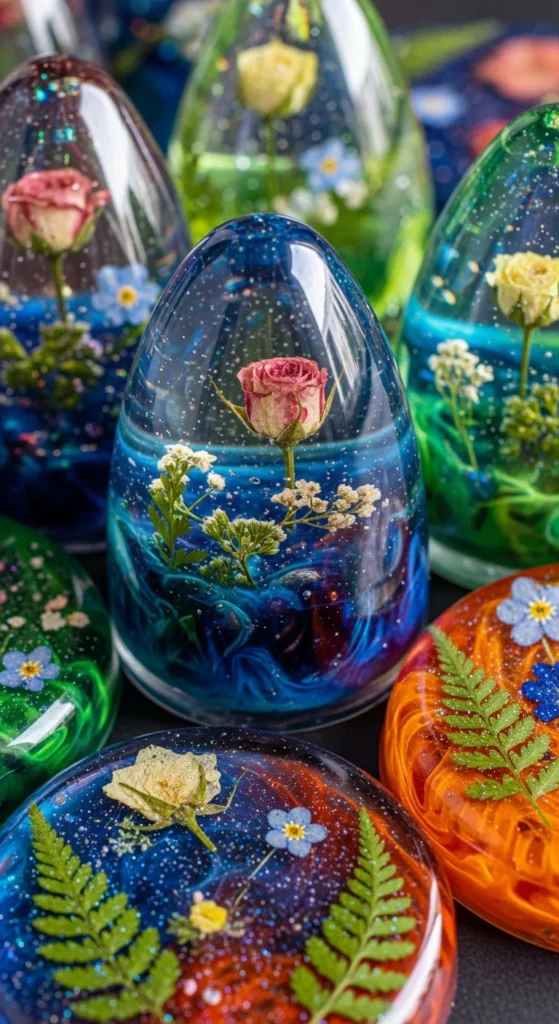
Step 6: Add Color, Glitter & Natural Elements
Make your resin designs stand out
- Use pigments or alcohol inks
- Add glitter for sparkle
- Embed dried flowers or leaves
- Try marble or swirl effects
Natural elements create trendy, high-end designs
Step 7: Pour Resin & Remove Bubbles
Get that smooth, glass-like finish
- Pour slowly into molds
- Use a heat gun or lighter to remove bubbles
- Don’t overfill molds
- Work gently and patiently
Bubble-free resin looks professional and clean
Step 8: Let Resin Cure Properly
Patience is key
- UV resin: cures in minutes under UV light
- Epoxy resin: takes 24–48 hours
- Keep dust away while curing
- Don’t touch until fully hardened
Proper curing gives strength and shine
Step 9: Fix Common Resin Mistakes
Avoid beginner problems
- Bubbles → use heat tool
- Sticky surface → incorrect mixing
- Uneven finish → surface not level
- Dust → cover while curing
Most issues are easy to fix with small adjustments
Step 10: Turn Resin Crafts Into Decor or Income
Take your hobby further
- Create home decor (trays, wall art, coasters)
- Make personalized gifts
- Sell jewelry and keychains
- Start a small online business
Resin crafts are highly sellable due to their premium look

Final Thoughts
DIY resin crafts are one of the most trending and rewarding creative hobbies
With simple tools and beginner-friendly techniques, you can create professional-looking decor at home
Start with small projects, focus on safety and mixing, and build your skills step by step
From glossy coasters to beautiful jewelry, resin offers endless creative possibilities
With creativity and patience, resin can turn into stunning, high-end handmade art